
Welcome to the world of beauty sculpting! Whether you’re a makeup novice or a seasoned pro, there’s no denying that contouring has become a game-changer in the cosmetics industry. With just a few strategic swipes of product, you can transform your face, accentuating your best features and creating stunning definition.
In this blog post, we’ll be diving deep into one of the most popular tools for achieving those chiseled cheekbones and flawless jawlines: the contour stick. But what exactly is it and how does it differ from other contouring products? Don’t worry – we’ve got all the answers for you!
So grab your brushes and get ready to enhance your natural beauty like never before. We’ll guide you through choosing the perfect shade for your skin tone, provide step-by-step instructions on how to use a contour stick effectively, share some expert tips and tricks for achieving flawless results, and even highlight some common mistakes to avoid along the way.
Whether you’re aiming for subtle everyday glam or going full-on Kardashian-level sculpted perfection, our comprehensive guide will have you mastering contouring techniques in no time. So let’s get started on this exciting journey towards beautifully defined features!
What is a contour stick and how it differs from other contouring products?
Contouring has become a popular makeup technique for achieving sculpted and defined features. And at the heart of this technique is the contour stick. But what exactly is a contour stick, and how does it differ from other contouring products?
A contour stick is a makeup product specifically designed for easy and precise application of contour color onto the face. It usually comes in a creamy texture that blends effortlessly into the skin. Unlike powder or liquid formulas, which can be more challenging to control, the solid form of a contour stick allows for greater precision.
One key advantage of using a contour stick is its convenience and portability. Its slim design makes it easy to carry in your bag, perfect for touch-ups on-the-go or when traveling.
Another benefit of using a contour stick is its versatility. Not only can you use it to create definition on your cheekbones, nose, and jawline; you can also use it as an eyeshadow or even as lipstick by blending different shades together.
When choosing a shade for your skin tone, always opt for one that’s slightly darker than your natural complexion but still complementary to avoid any harsh lines or unnatural-looking shadows.
Using a contour stick involves several simple steps: apply foundation first, then draw lines with the stick along areas you want to define (such as under cheekbones), blend outwards with fingers or brushes until seamless, and set with powder if desired.
To achieve flawless results when using a contour stick:
1) Blend thoroughly – make sure there are no visible lines between your foundation and contoured areas.
2) Use light strokes – building up gradually ensures better control over intensity.
3) Focus on symmetry – balance both sides of your face by mirroring placement techniques.
4) Practice proper lighting – check how your contours look in different lighting conditions to ensure they appear natural.
While using a brush may provide more precision during application, fingers work just fine too! Experiment with different tools to find what works best for you.
Benefits of using a contour stick
Achieving a beautifully sculpted look has never been easier, thanks to the wonders of contouring. And when it comes to contouring, one product that has taken the beauty world by storm is the contour stick. But what exactly makes this particular tool so special? Let’s explore its benefits!
First and foremost, using a contour stick offers unparalleled precision and control. The creamy texture allows for seamless blending and effortless application, ensuring that you can achieve perfectly defined cheekbones, a slimmer nose, or even a more chiseled jawline with ease.
Another advantage of using a contour stick is its versatility. Unlike powder or liquid contours, which may require additional brushes or sponges for application, the compact size of the stick makes it incredibly portable and convenient for touch-ups on-the-go.
Moreover, contour sticks often come in shades specifically designed to mimic natural shadows on various skin tones. This means that regardless of whether you have fair porcelain skin or deep ebony tones, there’s bound to be a shade out there perfect for you.
The long-lasting formula of most contour sticks ensures that your flawless complexion stays intact throughout the day without fading or smudging. Whether you’re attending an all-day event or just running errands around town – trust me when I say your perfectly contoured features will remain intact.
Lastly (but certainly not least!), using a contour stick can help enhance your overall makeup look by adding depth and dimension to your face shape. By strategically applying darker shades under areas like cheekbones and jawlines while highlighting others with lighter colors – voila! You can create stunning illusions that bring out your best features in no time.
How to choose the right shade for your skin tone
Choosing the right shade of contour stick for your skin tone is crucial in achieving a natural and flawless look. With so many options available in the market, it can be overwhelming to find the perfect match. Here are some tips to help you choose the right shade for your skin tone.
Determine your undertone – whether you have warm, cool, or neutral undertones. This will guide you in selecting a contour stick that complements your complexion. For warm undertones, opt for contour sticks with slightly golden or peachy tones. Cool undertones work well with shades that have more gray or ashy undertones. Neutral undertones can go either way but generally look best with earthy-toned contour sticks.
Next, consider your overall complexion – whether you have fair, medium, or deep skin tone. Fair complexions should go for lighter shades of contour sticks to avoid looking too harsh or unnatural. Medium skin tones can experiment with various shades within their range and even mix colors to achieve desired results.
Swatch and test out different shades on your jawline or wrist before making a purchase. Natural lighting is key when trying out different colors as artificial light may alter how they appear on your skin.
Remember that finding the perfect shade might require some trial and error, but don’t be discouraged! Experimenting and adjusting along the way will lead you to discover what works best for you.
Step-by-step guide on how to use a contour stick
Step 1: Prep your face
Before applying the contour stick, make sure to cleanse and moisturize your face. This will create a smooth canvas for the product and help it blend seamlessly into your skin.
Step 2: Choose the right shade
Selecting the correct shade of contour stick is crucial for achieving natural-looking results. Opt for a shade that is one or two shades darker than your natural skin tone. Avoid going too dark as it can appear harsh and unnatural.
Step 3: Identify areas to contour
The key areas to focus on when contouring are the hollows of your cheeks, temples, jawline, and nose. These are typically areas where shadows naturally occur on the face.
Step 4: Apply the contour stick
Using light strokes, apply the contour stick directly onto these areas. Start with a small amount of product and gradually build up if needed. Blend well using a brush or sponge to ensure a seamless finish.
Step 5: Highlight strategically
To further enhance your features, use a highlighting product on areas such as the tops of your cheekbones, brow bone, down the bridge of your nose, and cupid’s bow.
Step 6: Blend like a pro
Blend both the contour and highlighter together using gentle circular motions until there are no harsh lines visible. The goal is to create soft transitions between colors for an effortlessly sculpted look.
Remember practice makes perfect! Don’t be discouraged if you don’t get it right immediately – mastering this technique takes time and patience. Experiment with different shades and application techniques until you find what works best for you.
Tips and tricks for achieving flawless results
1. Prep your skin: Before applying any makeup, it’s crucial to prep your skin properly. Start by cleansing and moisturizing your face to create a smooth canvas for the contour stick.
2. Choose the right shade: Picking the correct shade of contour stick is essential for achieving natural-looking results. Opt for a shade that is one or two shades darker than your natural skin tone. Be mindful not to go too dark, as it can appear harsh and unnatural.
3. Blend, blend, blend: Blending is key when it comes to using a contour stick. Use a blending brush or sponge to seamlessly blend the product into your skin in gentle circular motions.
4. Focus on strategic areas: To sculpt and define your features effectively, focus on specific areas such as the hollows of your cheeks, jawline, temples, and sides of the nose.
5. Build up gradually: Start with a light hand when applying the contour stick and gradually build up if needed. It’s easier to add more product than remove excess once applied.
6. Use highlighter wisely: Pairing your contour with highlighter can enhance its effects further. Apply a highlighting powder or cream on top of high points like cheekbones, brow bones, and down the bridge of the nose for added dimension.
7. Set with powder: To ensure longevity and prevent smudging throughout the day, set your contour with translucent powder after blending everything together.
Remember that practice makes perfect! Experimenting with different techniques will help you find what works best for you.
Contouring mistakes to avoid
Contouring can be a game-changer when it comes to enhancing your natural features and sculpting your beauty. However, just like any makeup technique, there are certain contouring mistakes that can easily be made if you’re not careful. To ensure flawless results, here are some common contouring mistakes to avoid.
One of the biggest mistakes is using the wrong shade for your skin tone. Choosing a contour stick that is too dark or too light can result in an unnatural and harsh look. It’s important to select a shade that closely matches your natural shadows to achieve a seamless blend.
Another mistake is applying too much product at once. Remember, less is more when it comes to contouring. Start with a small amount of product and build up gradually until you achieve the desired intensity.
Blending is key! Many people make the mistake of not blending their contour properly, resulting in unsightly streaks or harsh lines on their face. Use a fluffy brush or sponge to blend out any harsh edges and create a soft gradient effect.
Additionally, contouring without considering your face shape can lead to unbalanced results. Different face shapes require different techniques and placements of contour products. Take into account whether you have round cheeks or angular features when deciding where to apply your contour.
Don’t forget about lighting! Contouring should enhance your features in natural light conditions rather than artificial lighting which may alter how it appears on camera or in person.
By avoiding these common mistakes and following proper techniques, you’ll be able to achieve flawlessly sculpted cheekbones and defined facial features with ease!
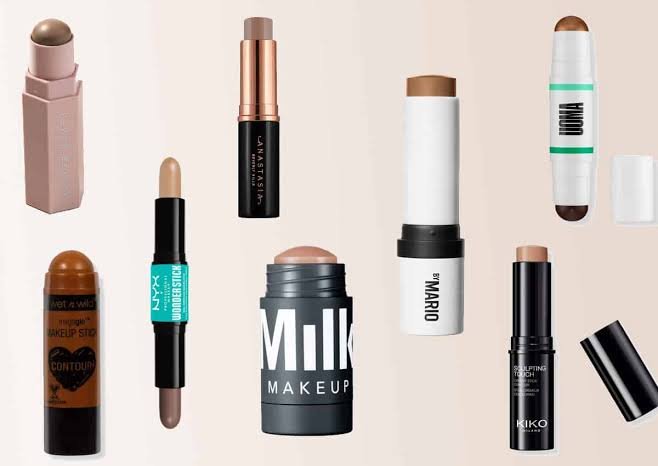
Best contour sticks on the market
When it comes to contouring, having the right tools is essential for achieving flawless results. One of the must-have products in your makeup bag is a good contour stick. These handy sticks are designed specifically for sculpting and defining your features with ease.
So, which contour sticks should you consider? Let’s take a look at some of the best options available on the market today.
1. Fenty Beauty Match Stix: This popular brand offers a range of shades that cater to different skin tones. The creamy formula blends seamlessly into the skin, giving you a natural-looking contoured effect.
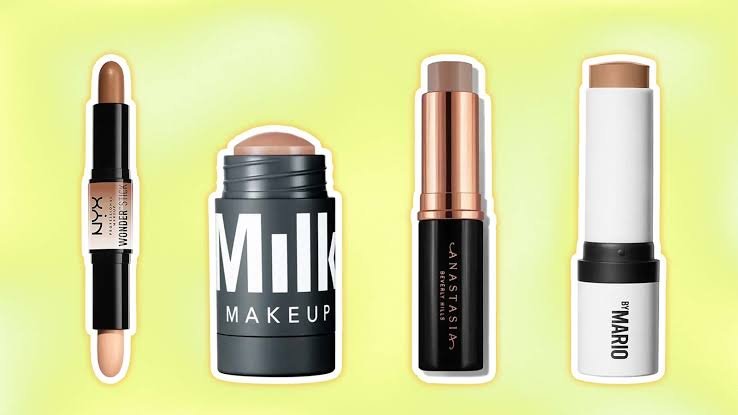
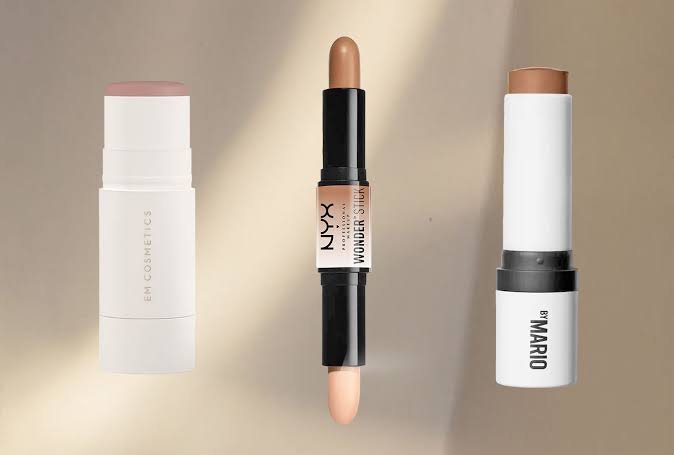
2. Anastasia Beverly Hills Stick Foundation: Known for their high-quality makeup products, Anastasia Beverly Hills delivers with their stick foundation-turned-contour product. The highly pigmented formula allows for precise application and long-lasting wear.
3. NYX Professional Makeup Wonder Stick: If you’re on a budget, this affordable option from NYX will not disappoint. With its dual-ended design featuring both cream highlighter and contour shade, it’s perfect for beginners or anyone looking to experiment with contouring.
4. Milk Makeup Matte Bronzer: While technically not marketed as a contour stick per se, this bronzer stick from Milk Makeup works wonders when it comes to creating depth and definition on your face. The matte finish gives a more natural look without any shimmer or sparkle.
Remember, choosing the right shade is crucial when selecting a contour stick that suits your skin tone perfectly!
Alternatives to using a contour stick
While contour sticks have gained popularity in the world of makeup, they may not be everyone’s cup of tea. If you’re looking for alternatives to achieve a sculpted look without using a contour stick, there are several options available.
One alternative is using powder products such as bronzer or matte eyeshadows. These can be applied with a fluffy brush to create depth and definition on your face. Simply choose shades that are darker than your skin tone and apply them strategically to the areas you want to sculpt.
Another option is cream products like blush or foundation sticks. These can be blended seamlessly into the skin for a natural-looking contour effect. Just make sure to choose shades that are cooler-toned and mimic shadows on your face.
If you prefer something more subtle, try using highlighter alone instead of combining it with a contour shade. Applying illuminating products on the high points of your face will give you an overall radiant and lifted appearance.
Don’t forget about good old-fashioned techniques like strategic placement of blush or even just using bronzer all over for a sun-kissed glow.
Experimenting with different techniques and products will help you find what works best for your individual preferences and needs when it comes to achieving that coveted contoured look without relying solely on a contour stick!
Conclusion
In the end, using a contour stick can truly transform your makeup game and enhance your natural beauty. With its easy application and versatile nature, it’s no wonder why this product has become a must-have in every makeup enthusiast’s collection.
Remember, choosing the right shade for your skin tone is crucial to achieve a seamless and natural-looking contour. Take the time to swatch different shades on your jawline or wrist before making a purchase.
Once you have found the perfect shade, follow our step-by-step guide to ensure flawless results. Start by applying the contour stick along the hollows of your cheeks, temples, jawline, and sides of your nose. Blend it out seamlessly with a brush or sponge for that soft-focus effect.
For an extra touch of dimension, don’t forget to highlight certain areas of your face using a lighter shade or illuminating powder. This will add depth and luminosity to complete your sculpted look.
As with any makeup technique, practice makes perfect! Don’t be discouraged if you don’t get it right on the first try. Experiment with different techniques and products until you find what works best for you.
Conclusion
In the world of makeup, contouring has become an essential technique to enhance our features and sculpt our beauty. And when it comes to achieving those perfectly chiseled cheekbones or a slimmed-down nose, a contour stick can be your best friend.
A contour stick is specifically designed for ease of use and precision in creating shadows and highlights on the face. Unlike other contouring products such as powders or creams, a contour stick offers convenience with its portable packaging and easy application.
By using a contour stick, you can effortlessly create definition and dimension to your face, giving it that coveted contoured look. Whether you’re aiming for subtle everyday glam or dramatic evening elegance, this versatile tool allows you to customize your level of intensity.
One of the major benefits of using a contour stick is its ability to provide seamless blending. With its creamy texture, it effortlessly glides onto the skin without leaving any harsh lines or patches. This makes it perfect for both beginners and professionals alike.
Choosing the right shade of contour stick is crucial in achieving natural-looking results. It’s important to select a shade that matches your skin tone rather than going too dark or light. Consider testing different shades on your jawline before making a purchase.